How (and Why) to Move Your Gallery Walk Outdoors
Students—and teachers—benefit from getting outside during the school day, and moving the traditional gallery walk outdoors is one way to make that happen.
The student-centered gallery walk protocol boosts engagement and gets students out of their chairs, moving around. Its versatility—for anything from facilitating peer feedback on poetry to math review—makes it one of my go-to teaching approaches.
You can further supercharge your gallery walk by moving it outdoors to increase students’ enthusiasm; enhance their attention; and improve their critical thinking, creativity, problem-solving, and behavior. An outdoor nature gallery can reduce stress and bolster social and emotional well-being.
Research shows that learning outdoors also holds the potential to improve health and educational disparities, having a disproportionately positive impact on marginalized students. What’s more, studies show promise with regard to how nature connections can support neurodivergent learners, including those with autism spectrum disorder and attentional disorders.
There’s something in it for teachers, too. When students feel, behave, and learn better, it makes our lives better. And we also experience many of the same benefits from time in nature.
Here’s how to move your gallery walk outdoors.
Setting Up for Success
To begin, consider temperature and weather, and plan to include transition time to get students prepared for their excursion. You can provide a reflection prompt or pair-share activity for students to engage in as you travel to the gallery site.
To choose a site, identify outdoor space to fit your class and the gallery. Walk the site in advance to identify and remove hazards (e.g., a dead branch that could fall, dangerous trash). Set the boundaries within which students will work, and decide where you will place artifacts—spread them out, but not too far.
Set up your site depending on your environment—here are a few tips by setting.
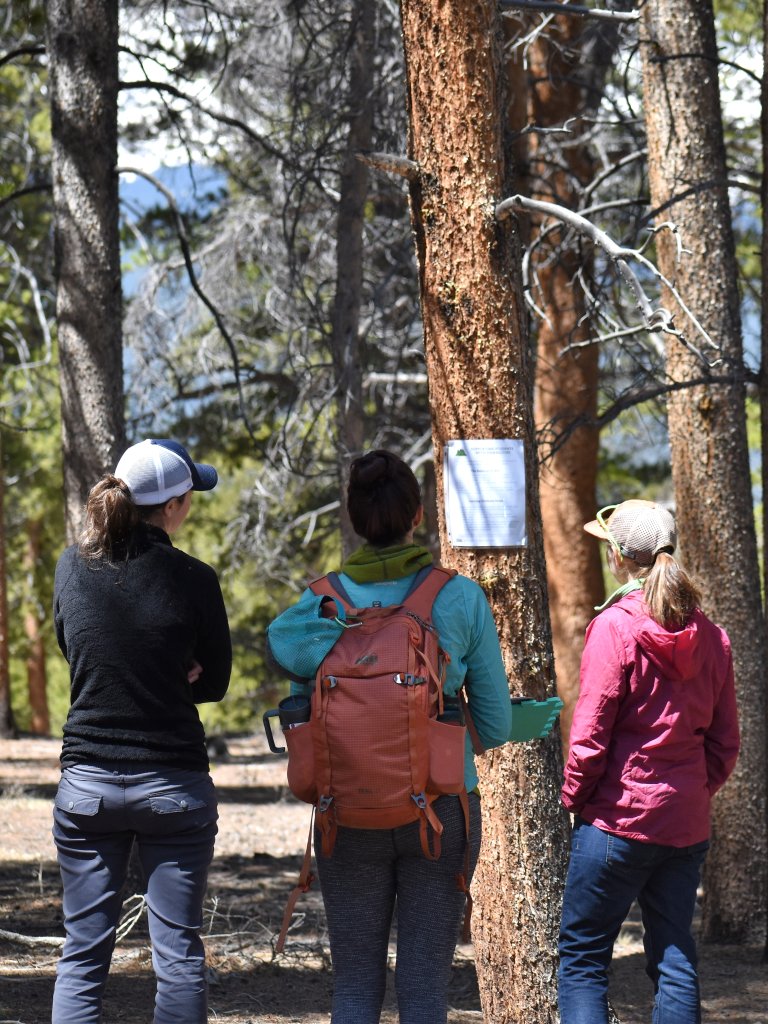
Softwood forest (e.g., pine, fir, redwood): Place artifacts in plastic sheet protectors, and staple or use push pins to attach artifacts directly to trees. This is fast and doesn’t hurt the tree. Just be sure to carefully collect the staples or push pins afterward.
Hardwood forest (e.g., oak, ash, maple) or shrub area: Cut pieces of cardboard in approximately 12-by-14-inch rectangles. Glue or tape a plastic sheet protector to each piece of cardboard and insert artifacts. Punch holes in the top corners of the cardboard (repeat on the bottom corners if you live in a wind-prone area to prevent flapping). Tie a string about 5 feet long, or longer if you have large-circumference trees, to one hole. Tie your art to trees or bushes. You can reuse these cardboard signs.
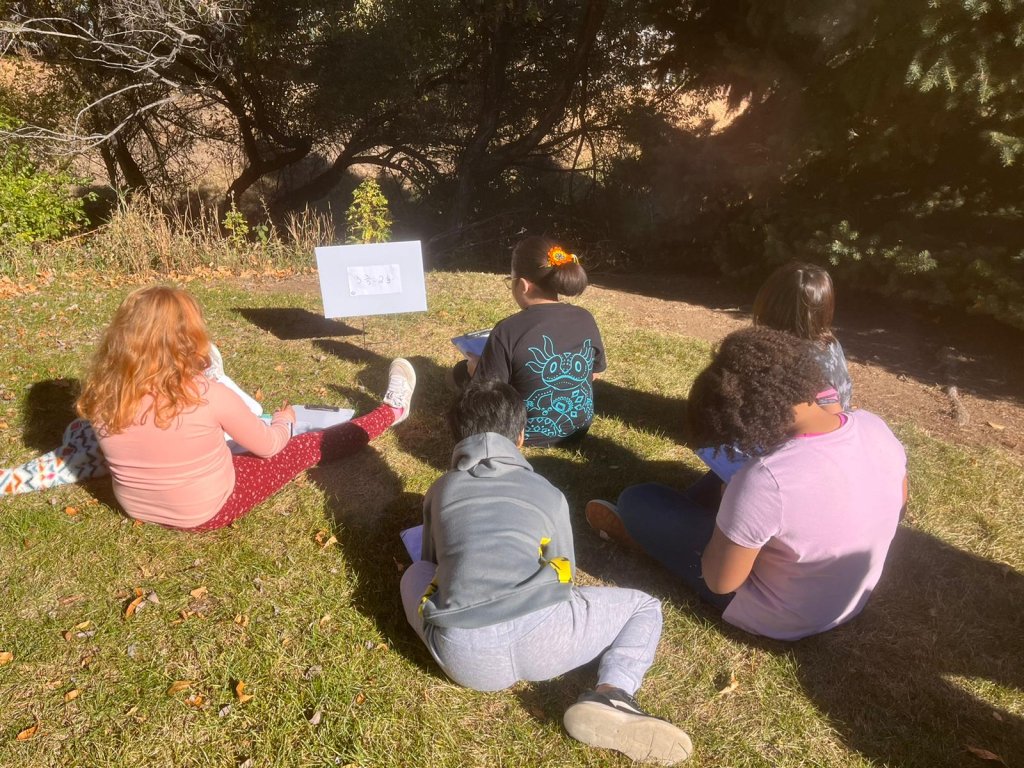
Open field: This is like the hardwood/shrub area, but instead of cardboard, mount your sheet protectors to yard signs and distribute them around the field. Place a blanket or mat in front of each station, or have students carry sit pads. Sit pads can be foam pieces, corrugated cardboard squares, towels, banana leaves—you decide. You can buy blank yard signs for about $3 each (to reuse) online, or cover and upcycle political signs after election season.
Open field with frozen ground or asphalt: Place your gallery walk artifacts in sheet protectors and distribute them on the ground. Weigh down the artifacts with rocks so they won’t blow away. Students can pick up the gallery artifacts and stand while they examine them, or you can use blankets or sit pads as noted above.
Beach: I haven’t worked in a beach setting, but I suspect you could use the same technique as for an open field.
Accounting for Seasons and Weather
Some of my favorite nature galleries have taken place in winter snow. Though setup takes more effort, snowy surroundings can provide a magical backdrop for a nature gallery. Tromp down a path for walking, or if your school has a set of snowshoes, this is a perfect time to break them out.
On the flip side, there’s nothing like a shady forest nature gallery with a gentle breeze on a hot day, especially if your classroom doesn’t have air-conditioning. Moving your gallery walk outdoors will often be a better choice. That said, there’s no harm in a rain check should the weather not suit your and your students’ needs.
Include students with physical disabilities and learning differences
As with indoor activities, we need to design our lessons for all students. To accommodate students with physical limitations, you might post your nature gallery signs lower and along a paved path for a student in a wheelchair. Or you might use brightly colored paper, large fonts, and pictures to support students with visual and verbal processing challenges.
Have a proactive conversation with your special education team and school nurse to align your nature gallery with individual student supports. Remember, your outdoor classroom is a classroom, and many approaches to differentiation can make this endeavor a success.
Manage Risk and Plan Content
There are plenty of hazards that we manage indoors, from arranging furniture to making intentional groupings. Outdoors, you should also proactively manage hazards (for example, don’t put your gallery next to a wasp’s nest). Deliberate planning and preparation will go a long way to manage risks.
Virtually any classroom content that would lend itself to an indoor gallery walk will also work outdoors, though I don’t recommend using Post-it notes outside. Plus, more space to spread out and be noisy can open up new possibilities.
I know a teacher whose students raced to find sight words, for example. You could create a mash-up gallery walk/scavenger hunt. Or perhaps you’ll facilitate a gallery-style timeline activity where students can reorder the artifacts to match with chronology. Or you might create rich sensory mindfulness stations connected to nature (e.g., students name five things they see, four things they hear, three things they can touch, two things they can smell, and then take one breath). After you do an outdoor nature gallery, you might find that you want to move other learning outdoors, too. The sky’s—quite literally—the limit.